You’ve been to the doctor and just gotten a CT or MRI. How cool would it be if you could actually hold a 3D model of your scan?
One of the amazing things that 3D printers can do is print models from MRI, CT-scans, and Ultrasound medical imaging. In the future we can expect that doctors will take 2D scans, convert them to a 3D printed model, and use the model to explain what is going on. They are already using this technology to better prepare themselves for surgeries.
How to Make a 3D print from an MRI or CT scan
Until 3D printed models are commonplace at the doctor, you may want to make your own! After you have imaging done, make sure to get a copy of the imaging on a cd or jump drive. Next, you will need several different software packages to get everything worked out:
1. OsiriX imaging software
2. Meshlab
3. Meshmixer
Process 1: Convert Native Imaging File to .stl
1. You need something that can convert a .diacom file to a .stl file. (.diacom is the file format that most medical imagers use) I recommend OsiriX imaging software.
2. Once you get OsiriX installed, open it and hit the “import button” in the top right hand corner.
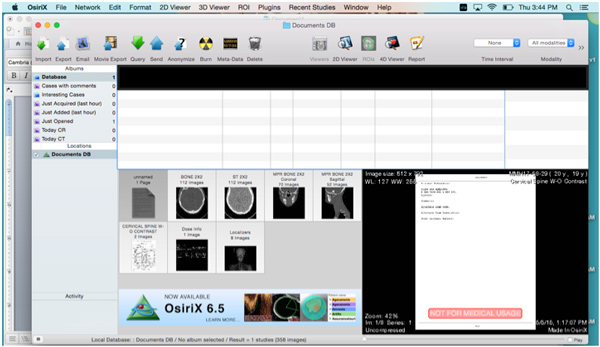
3. Load the images from your CD or jump drive. When you open the page it should look something like this
4. Choose the file you want and then double click on it to open it up (I would suggest doing the file that has the most images because it will give you the best model). A window will appear that will tell you that the free version is not certified for medical use, click on the “I agree box” and it will take you on to the next step.
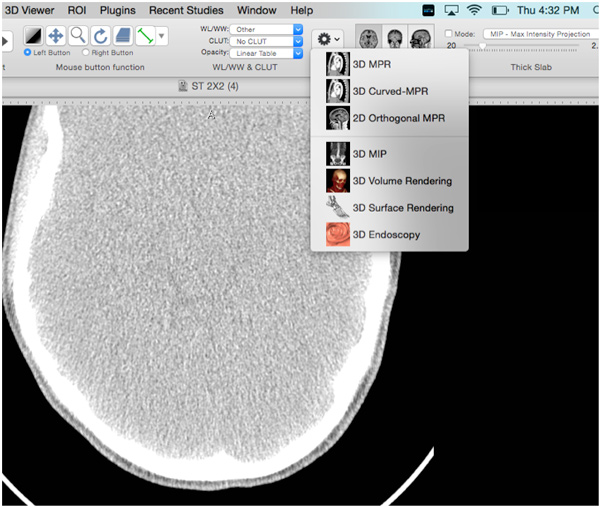
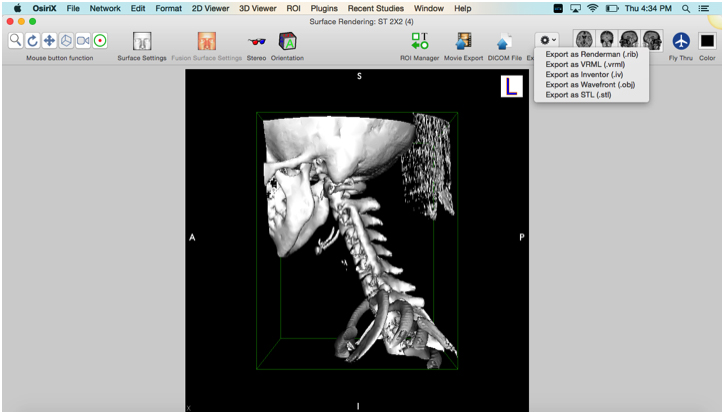
5. When you first open the page you will see a normal two dimensional image. We need to display it as a three dimensional image so select the little gear labeled “2D/3D” and select “3D surface rendering” which is shown below.
You should now see a three dimensional image of your scan–pretty awesome!
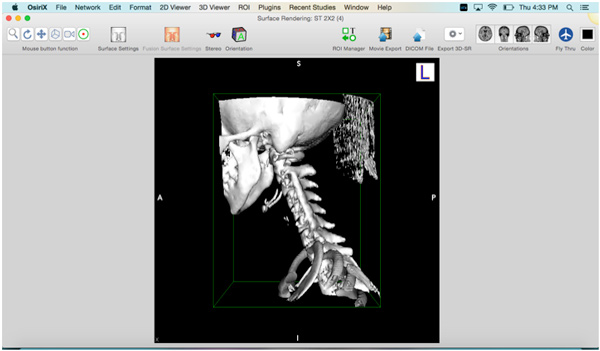
6. For the last step we need to convert the model into a .stl file. Find the small gear in the corner that says “Export 3D-SD” and select the last option which is to “export as an .STL file”. (*Be sure to keep track where you are saving everything because we are using several programs and lots of steps.)
Process 2: Making a Selection
The next program we are going to use is a free software called Meshlab.
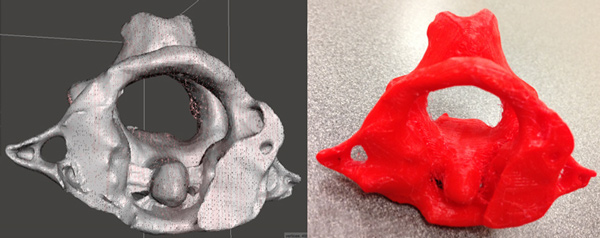
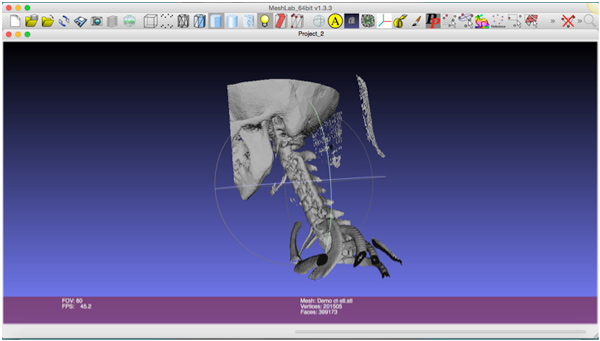
1. Once you have downloaded Meshlab and installed it, open it up and select “File” then “Import Mesh”. Select the file that you just exported from OsiriX and press okay when the window pops up. You should have something that looks similar to this (with your own image):
*Be sure to save your project often–Meshlab seems to crash a lot.
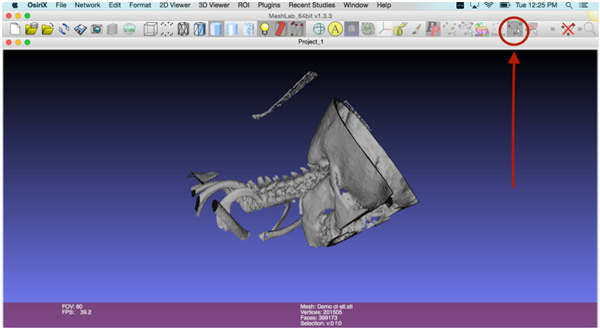
2. Once the file is loaded we need to trim down the file to include only the parts we want. For this demo I only want the first two vertebrae of the neck which are known as the Axis and the Atlas. To do this you will use the “select verteces” tool in the upper right part of the tool bar. Carefully select the pieces you want. IMPORTANT: make sure that the selection you make is not overlapping any piece that you want to keep. When you select something it will select everything that falls within that box regardless if it is behind something else.
The selector tool looks like this:
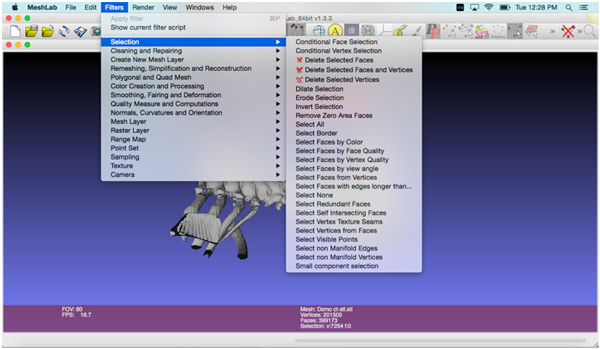
3. Once you have a selection made you will go to the “Filters” -> “Selection”-> “Delete Selected vertices” and this will delete whatever you have selected.
This is the most time consuming part of the process because if you want a nice print you need to make sure to remove everything you don’t want in the print. Again, this takes a while, so take your time.
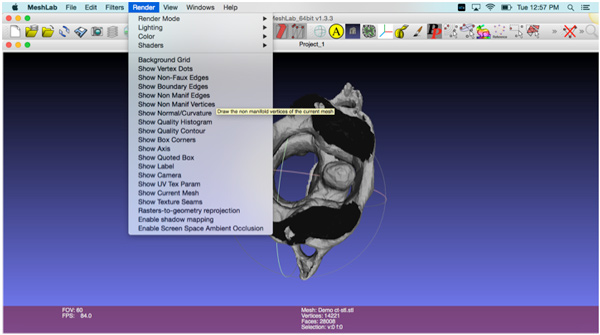
4. Once you have the parts that you want to print isolated, go to “Render”-> ”Show non manif edges” and again to “Render” -> “Show non manif vertices”.
This will bring up a box that should look like the following:
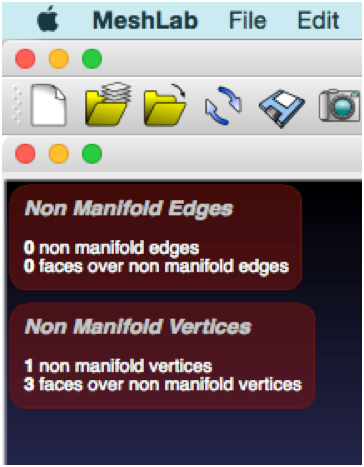
5. Next go to “Filters” -> “Selection” -> “Select non manifold edges” and then delete them like you did when you were using the selection tool (“Filters” -> “Selection” -> “delete selected vertices”). Then do the same thing, but instead of selecting the non manifold edges use the “Select non manifold vertices” and delete those as well. Sometimes you may have to do this a few times before the numbers in the pin boxes in the corner all read zero.
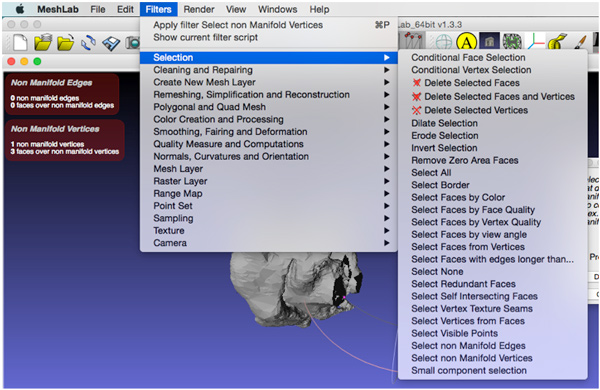
6. The next step will smooth everything out so it will look nicer. Hit the “Filters” -> “Smoothing” -> “Laplacian Smooth”.
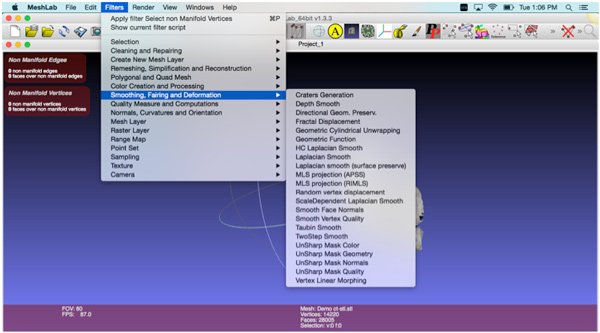
A window will come up and change the Smoothing steps down to one. Then hit apply. You should be able to notice a change in the surface of the model and you can hit apply as many times as you would like but I normally only use it once or twice.
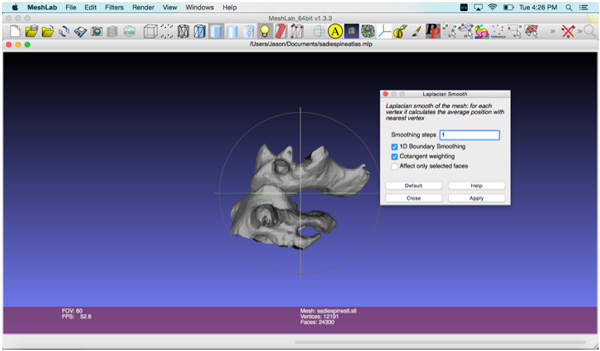
We are now down with MeshLab so all we have to do is export it out as an .stl file again. We do this by going to “File” -> “Export Mesh as” and then making sure that we are saving in an .stl file format.
Process 3: Repairing and Finishing
The last software we are going to need is Meshmixer.
1. Once you get it up and running hit the import button and select the file you saved from Meshlab.
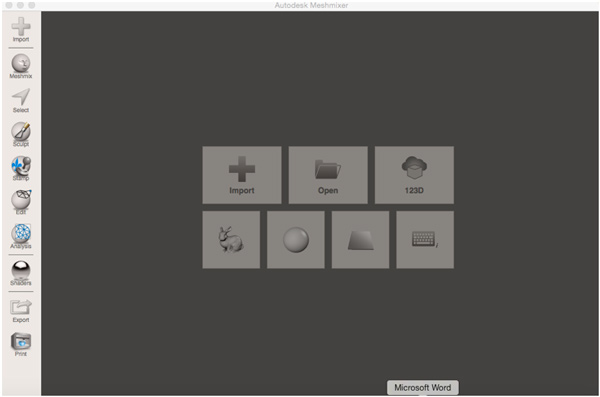
2. Next we want to repair any holes in the model. Select the “Analysis” tab and then “Inspector.”
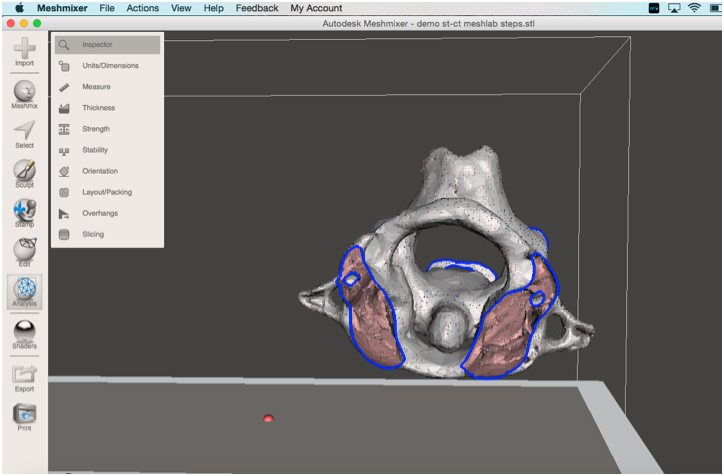
3. It should bring up a bunch of colored lines that shows where there are holes but we are just going to hit the “Auto repair button” and let it do its thing.
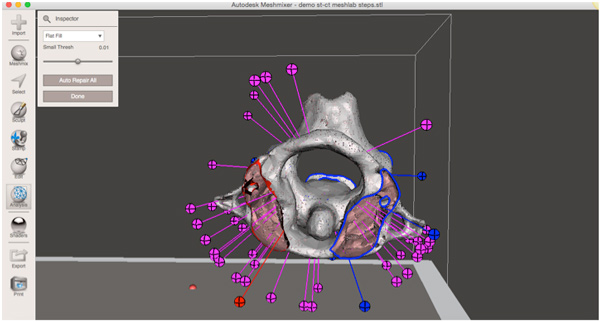
4. You may need to slide the “small thresh” slider around and experiment until you can get all the holes patched up. After this hit “Done” and then hit the “Edit” button on the sidebar. You will see the “Make Solid” button so click on it and then hit “Accept.”
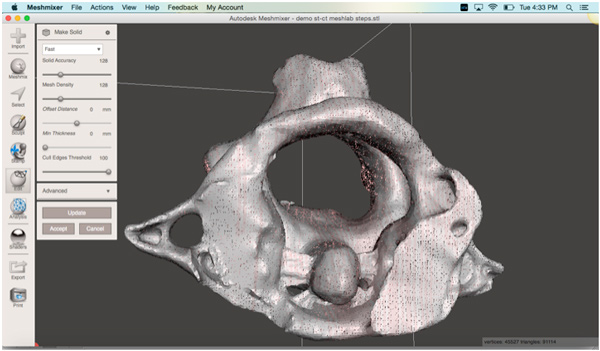
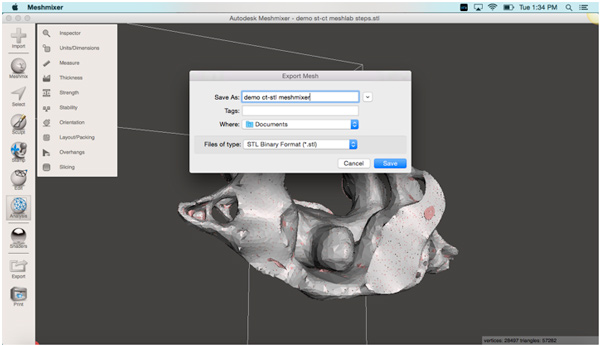
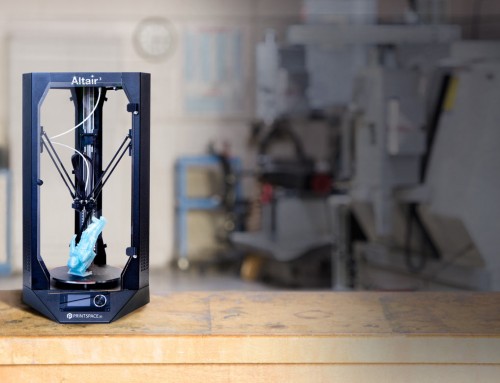
5. This should go in and remove most of the cavities or voids on the inside of the model so it won’t interfere with the print. Once you have done this you are ready to print. Meshmaker can slice and generate G code for most Cartesian printers so if you want to use it go right ahead. I am using the Altair Delta printer so I will hit “Export” and make sure to save it as an .stl binary file.
Once you have done this you should be able to import your file into the software of your choice and get printing!
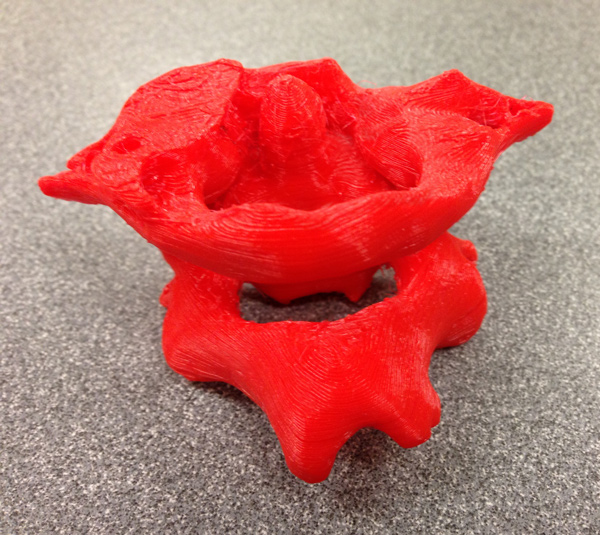
Our Finished Vertebrae 3D Print from a Medical Image
