If you are already into 3D printing, you may have noticed is some model repositories an option to make your own version of a model—often called Parametric Modeling. It is sometimes an option for wearables and machine components. The “Parametric Measuring Spoon” may list parameters to change a part. In essence, parametric modeling is a different approach to making a model—you are making a type of piece that can be easily modified to a variety of different sizes and applications.
Why use Parametric Modeling?
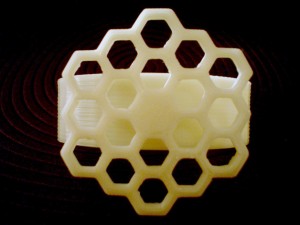
For wearables, a good example is the Openstock, printable parametric sandals designed to scale according to a specified shoe size. Change a few variables and it will be just right for your foot. Parametric wearables typically are intended to be the perfect fit for the wearer. Rings and bracelets are also common projects where you may see this.
When it comes to making parts, parametric design can be equally useful. Let’s say you need to make a few gears for your latest awesome idea…the brilliant one that will put all your friends in a state of awe. You could start up your 3D modeling program of choice, and carefully do the math for each gear, then carefully model each piece individually. All the gear teeth need to mesh properly, so you can design one and scale it up. You need to start with your cylinder primitive and carefully cut teeth into it, knowing irregularities will cause problems for the mechanisms you designed. Slowly you make the pieces…
Or you design a parametric gear (or use one of the readily available gear libraries), change a few variables, and have your gears rendered precisely. A lot less grunt work is involved in this. You can spend more time focusing on the filament feeder of your dreams rather than if the separation of 2 gear teeth from each other is correct in order to keep the rate constant.
Most of the parametric models for 3D printing I’ve seen use OpenSCAD. It uses a simple language to describe the part (most people with a programming background will recognize the c-like syntax) and allows you to export a .stl file easily. It’s also open source, so it’s freely available on the Mac, PC, and Linux platforms. A SCAD editor is also available for Android called ScorchCAD, but it hasn’t implemented all of the SCAD features yet.
Let’s Try It
Here’s a short example of what some of the design looks like:
difference () {
     rotate ([0,0,45]) translate ([-2,-3,1]) cube ([10,10,10]);
     cylinder (r=4,h=20);
 }
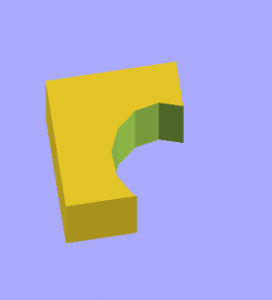
This snippet first shows that we’re taking two objects, and cutting the first out of the second (the difference command surrounding the other two lines in curly braces). The first object is a cube with the dimensions in parenthesis and square brackets. This cube is being rotated, then moved (the translate command). The second object is a cylinder (with it’s radius and height given) that will be cut out of the initial cube.
All of the numbers above could be substituted as variables, kept as an easily changeable list at the start of the .scad file. Need a different radius cut out of the cube? Change the radius variable. It’s simple as that.
At this point, if you’ve never programmed before you might be a little hesitant to give this a try. Although people with coding experience may take to this a little quicker, it still is relatively easy to start, with decent documentation and tutorials available. If nothing else, you start by making a simple cube or cylinder, and render it. There’s your cube on the screen. Try making another change, and rendering it again.
Although not the best choice in every situation, consider designing your next thing parametrically. If you ever need to change it and print a new one, you may save some time.

Photo credit: Lampshade by joostn

Photo credit: Beehive Bracelet by catarina
